Wednesday, July 30, 2014

Tinolang Manok( Filipino stewed chicken) is one of the popular dishes in Philippines. Green papaya, lemon grass and horse radish are added to the dish to make the flavor perfect.

Ingredients:
1 whole Native chicken ( slice to your desired size)
thumb size ginger( strips)
3 cloves garlic
1 small onion
1 small unripe papaya
2 cups horse radish ( malunggay)
1 stalk lemon grass (tanglad)
6 cups rice washing ( add if needed)
1/4 cup fish sauce (patis) optional
Salt and pepper to taste
Native Chicken

Procedure:
1. Saute the garlic, ginger and onion then add the chicken and braised for few minutes.
2. Add the fish sauce(patis), if there is no fish sauce just put salt and pepper, simmer for 5 minutes to allow the flavors to blend well.
3. Add the rice washing and bring to a boil until the chicken meat is tender. Add the lemon grass and papaya then simmer until almost done.
4. Add the horse radish then simmer for 30 seconds and turn off the heat, then serve hot

Chili leaves can be added too

source : http://melyskitchen.blogspot.com/
7:37 PM Admin0
Tinolang Manok( Filipino stewed chicken) is one of the popular dishes in Philippines. Green papaya, lemon grass and horse radish are added to the dish to make the flavor perfect.

Ingredients:
1 whole Native chicken ( slice to your desired size)
thumb size ginger( strips)
3 cloves garlic
1 small onion
1 small unripe papaya
2 cups horse radish ( malunggay)
1 stalk lemon grass (tanglad)
6 cups rice washing ( add if needed)
1/4 cup fish sauce (patis) optional
Salt and pepper to taste
Native Chicken

Procedure:
1. Saute the garlic, ginger and onion then add the chicken and braised for few minutes.
2. Add the fish sauce(patis), if there is no fish sauce just put salt and pepper, simmer for 5 minutes to allow the flavors to blend well.
3. Add the rice washing and bring to a boil until the chicken meat is tender. Add the lemon grass and papaya then simmer until almost done.
4. Add the horse radish then simmer for 30 seconds and turn off the heat, then serve hot

Chili leaves can be added too

source : http://melyskitchen.blogspot.com/

July is a nutrition month in the Philippines and I want to contribute a healthy and affordable recipe to all the parents who keep on soliciting ideas for nutritious dish that they can prepare for their kids, since horse radish (malunggay) is always available or common in our own backyards, I came up with this idea, I hope that you will try this recipe and let me know.

Ingredients for 4 servings:
3 large eggs (lightly beaten)
1 small onion (sliced thinly)
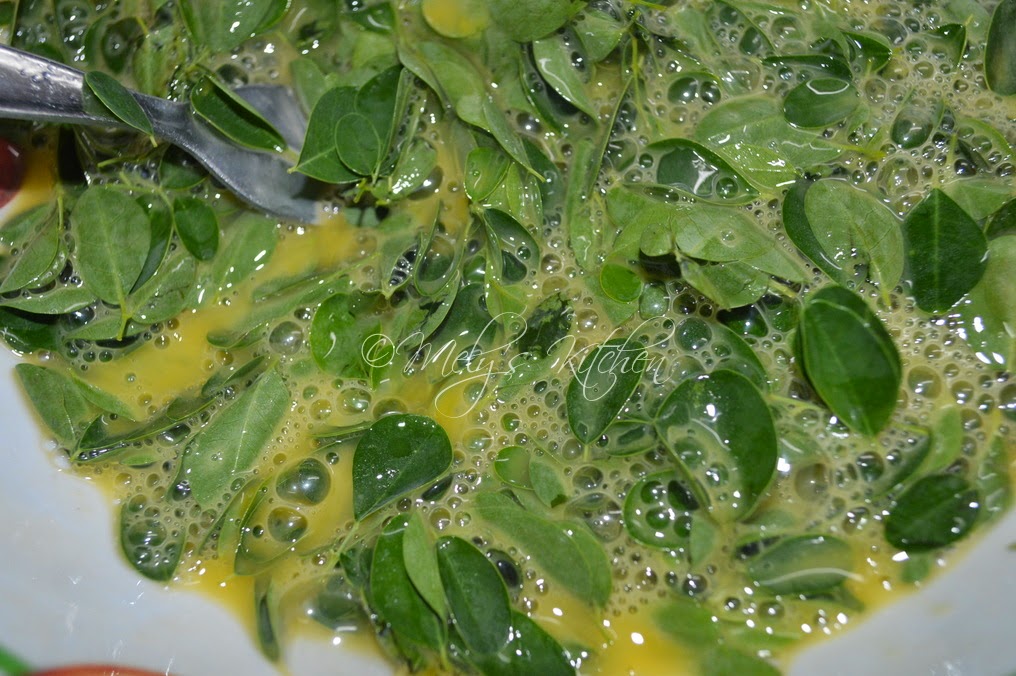
1/2 cup horse radish (malunggay)
salt and pepper to taste


Procedure:
1. Mix all the ingredients until fully combined.
2. Heat an oil then pour the egg mixture and cook until done.
3. Serve with a smile :-) .


source : http://melyskitchen.blogspot.com/
2:55 PM Admin0

July is a nutrition month in the Philippines and I want to contribute a healthy and affordable recipe to all the parents who keep on soliciting ideas for nutritious dish that they can prepare for their kids, since horse radish (malunggay) is always available or common in our own backyards, I came up with this idea, I hope that you will try this recipe and let me know.

Ingredients for 4 servings:
3 large eggs (lightly beaten)
1 small onion (sliced thinly)
1/2 cup horse radish (malunggay)
salt and pepper to taste


Procedure:
1. Mix all the ingredients until fully combined.
2. Heat an oil then pour the egg mixture and cook until done.
3. Serve with a smile :-) .


source : http://melyskitchen.blogspot.com/


Onions are very common kitchen staples. But there’s a lot more than meets the eye. Like their pungent taste and smell, onions have extraordinarily powerful health benefits. Here are some of the many:

1. They have phytochemicals that enhance the effectiveness of Vitamin C in the body. That means better body resistance to sickness.

2. They have chromium that helps blood sugar regulation.

3.  Like garlic, onions have antimicrobial element called allicin. They can be used as first aid remedies for cuts or wounds. Crush a half of onion (you can add raw honey for better results) and apply on the wound. Leave on for 20 minutes and wash off.

4. Did you know that onions stimulate the production of good cholesterol (HDL)? It keeps your heart fit and well.

5. Got stung by a defensive honeybee? Apply onion juice on the inflicted area to feel relieved from pain and burning sensation.

6. See those bright green tops sprouting from onion bulbs? They are rich in vitamin A! Use them often in your cooking.

7. Flavonoid quercetin, an antioxidant found in onions, helps to get rid of free radicals. It also protects and aids our body to regenerate vitamin E.

I know you got teary-eyed with these heart-touching health benefits. Wipe your tears and start chopping onions now. Surely you will never look at them in the same way again. :)


WARNING!
Onions are toxic to your dog!

Thanks to the best gardener, Mr. Arcon Agbuya for contributing this wonderful article.

source : http://melyskitchen.blogspot.com/
9:28 AM Admin0


Onions are very common kitchen staples. But there’s a lot more than meets the eye. Like their pungent taste and smell, onions have extraordinarily powerful health benefits. Here are some of the many:

1. They have phytochemicals that enhance the effectiveness of Vitamin C in the body. That means better body resistance to sickness.

2. They have chromium that helps blood sugar regulation.

3.  Like garlic, onions have antimicrobial element called allicin. They can be used as first aid remedies for cuts or wounds. Crush a half of onion (you can add raw honey for better results) and apply on the wound. Leave on for 20 minutes and wash off.

4. Did you know that onions stimulate the production of good cholesterol (HDL)? It keeps your heart fit and well.

5. Got stung by a defensive honeybee? Apply onion juice on the inflicted area to feel relieved from pain and burning sensation.

6. See those bright green tops sprouting from onion bulbs? They are rich in vitamin A! Use them often in your cooking.

7. Flavonoid quercetin, an antioxidant found in onions, helps to get rid of free radicals. It also protects and aids our body to regenerate vitamin E.

I know you got teary-eyed with these heart-touching health benefits. Wipe your tears and start chopping onions now. Surely you will never look at them in the same way again. :)


WARNING!
Onions are toxic to your dog!

Thanks to the best gardener, Mr. Arcon Agbuya for contributing this wonderful article.

source : http://melyskitchen.blogspot.com/

Tuesday, July 22, 2014

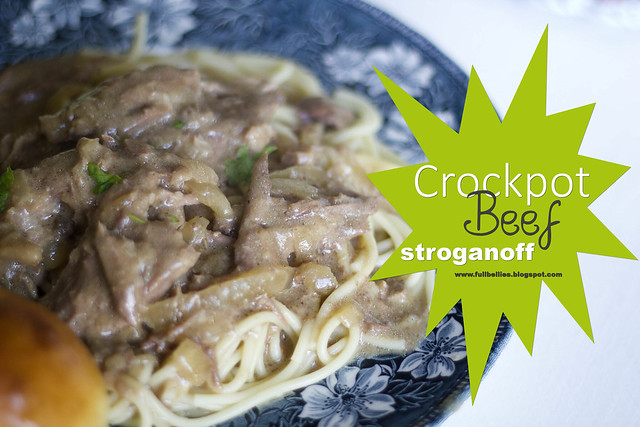
Ooooohhhhh beef stroganoff.  I think it is right up there in the comfort food list for me.  I don't make it very often, but this quick and easy crockpot recipe may just change that.

Crockpot Beef Stroganoff

Crockpot Beef Stroganoff
Source:  All Recipes


1 1/2 pounds top round steak, cut into strips
salt and pepper to taste
1/2 onion, chopped
1 (10.75 ounce) can condensed cream of mushroom soup
1 (8 ounce) can canned mushrooms
1/4 cup water
1 tablespoon dried chives
1 clove garlic, minced
1 teaspoon Worcestershire sauce
1 cube beef bouillon
1/4 cup white wine
1 tablespoon all-purpose flour
1 (16 ounce) container sour cream
1/2 cup chopped fresh parsley


Place the beef in the bottom of a slow cooker, and season with salt and pepper to taste. Place onion on top of beef, and then add mushroom soup, mushrooms, and water. Season with chives, garlic, Worcestershire sauce, and bouillon.

In a small bowl, mix together the wine with the flour. Pour over the beef.

Cover, and cook on Low for 6 to 7 hours. Stir in the sour cream and parsley, and continue cooking for 1 hour.

source : http://fullbellies.blogspot.com/
5:21 PM Admin0
Ooooohhhhh beef stroganoff.  I think it is right up there in the comfort food list for me.  I don't make it very often, but this quick and easy crockpot recipe may just change that.

Crockpot Beef Stroganoff

Crockpot Beef Stroganoff
Source:  All Recipes


1 1/2 pounds top round steak, cut into strips
salt and pepper to taste
1/2 onion, chopped
1 (10.75 ounce) can condensed cream of mushroom soup
1 (8 ounce) can canned mushrooms
1/4 cup water
1 tablespoon dried chives
1 clove garlic, minced
1 teaspoon Worcestershire sauce
1 cube beef bouillon
1/4 cup white wine
1 tablespoon all-purpose flour
1 (16 ounce) container sour cream
1/2 cup chopped fresh parsley


Place the beef in the bottom of a slow cooker, and season with salt and pepper to taste. Place onion on top of beef, and then add mushroom soup, mushrooms, and water. Season with chives, garlic, Worcestershire sauce, and bouillon.

In a small bowl, mix together the wine with the flour. Pour over the beef.

Cover, and cook on Low for 6 to 7 hours. Stir in the sour cream and parsley, and continue cooking for 1 hour.

source : http://fullbellies.blogspot.com/
As much as I love making fresh bread and kneading the dough and going through the whole process, sometimes I rely on my bread machine.  Especially if I want a loaf or rolls but have other things going on and don't have the time to be in the kitchen.

This recipe is wonderful for that, not only does it always turn out great, but I can get the dough going while I finish chores or run an errand.

Bread Machine Yeast Rolls

Bread Machine Yeast Rolls
Source: Betty Crocker

1 cup water
2 tablespoons butter or margarine, softened
1 egg
3 1/4 cups Gold Medal™ Better for Bread™ flour
1/4 cup sugar
1 teaspoon salt
3 teaspoons bread machine or active dry yeast
Butter or margarine, melted, if desired


Measure carefully, placing all ingredients except melted butter in bread machine pan in the order recommended by the manufacturer. Select Dough/Manual cycle. Do not use delay cycle.

Remove dough from pan, using lightly floured hands. Cover and let rest 10 minutes on lightly floured surface.
Grease large cookie sheet with shortening. Divide dough into 15 equal pieces. Shape each piece into a ball. Place 2 inches apart on cookie sheet. Cover and let rise in warm place 30 to 40 minutes or until double. (Dough is ready if indentation remains when touched.)

Heat oven to 375°F. Bake 12 to 15 minutes or until golden brown. Brush tops with melted butter. Serve warm, or cool on wire rack.

Bread Machine Yeast Rolls

source : http://fullbellies.blogspot.com/
5:17 PM Admin0
As much as I love making fresh bread and kneading the dough and going through the whole process, sometimes I rely on my bread machine.  Especially if I want a loaf or rolls but have other things going on and don't have the time to be in the kitchen.

This recipe is wonderful for that, not only does it always turn out great, but I can get the dough going while I finish chores or run an errand.

Bread Machine Yeast Rolls

Bread Machine Yeast Rolls
Source: Betty Crocker

1 cup water
2 tablespoons butter or margarine, softened
1 egg
3 1/4 cups Gold Medal™ Better for Bread™ flour
1/4 cup sugar
1 teaspoon salt
3 teaspoons bread machine or active dry yeast
Butter or margarine, melted, if desired


Measure carefully, placing all ingredients except melted butter in bread machine pan in the order recommended by the manufacturer. Select Dough/Manual cycle. Do not use delay cycle.

Remove dough from pan, using lightly floured hands. Cover and let rest 10 minutes on lightly floured surface.
Grease large cookie sheet with shortening. Divide dough into 15 equal pieces. Shape each piece into a ball. Place 2 inches apart on cookie sheet. Cover and let rise in warm place 30 to 40 minutes or until double. (Dough is ready if indentation remains when touched.)

Heat oven to 375°F. Bake 12 to 15 minutes or until golden brown. Brush tops with melted butter. Serve warm, or cool on wire rack.

Bread Machine Yeast Rolls

source : http://fullbellies.blogspot.com/

Friday, July 18, 2014

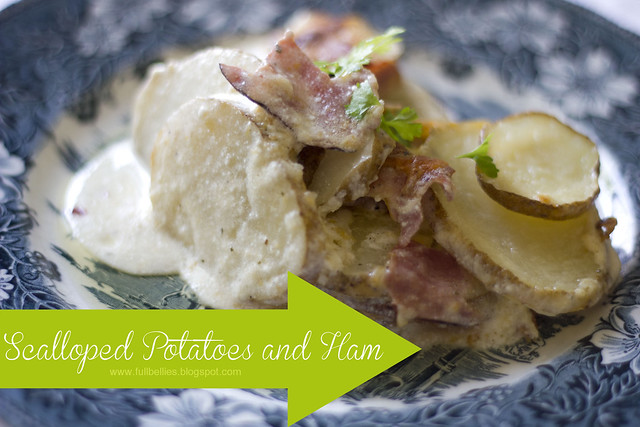
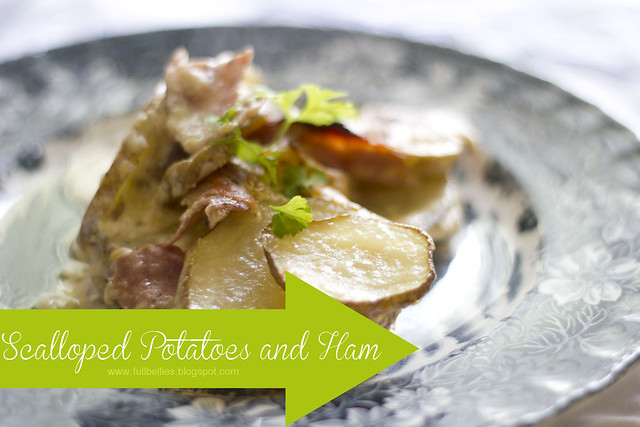
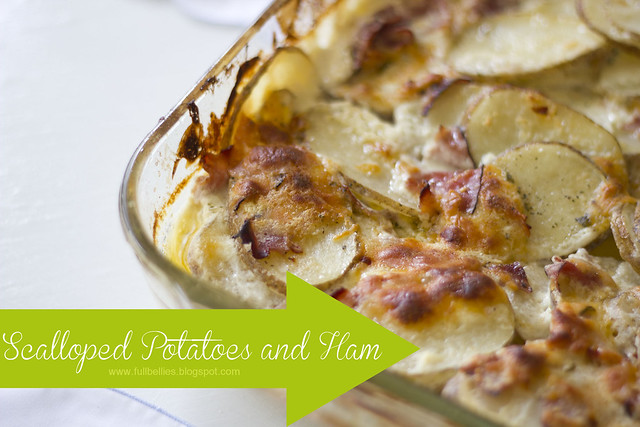
Scalloped Potatoes and Ham

Mmmmmm, comfort food.  If I could eat just comfort food, every single day, without ever putting on weight, I would do it.

Alas, I'm watching what I eat so I don't make these scalloped potatoes and ham very often, but last night, it just came together and at the request of my daughter, these were put in the oven.

I really have to control myself and not over do it, seriously, I could eat 2 or 3 helpings of these.  So good.

Scalloped Potatoes and Ham
Adapted from:  Kraft.com


7 medium potatoes, cut into 1/4-inch-thick slices
1 container (16 oz.) BREAKSTONE'S FREE or KNUDSEN Fat Free Sour Cream
Salt and pepper to taste
Chili flakes to taste
Shredded Mexican Blend cheese
1/2 lb. Black forest ham (I just tore it into small bite size pieces)
Buttermilk
 

HEAT oven to 350°F.

COOK potatoes in boiling water in large saucepan 10 to 12 min. or just until potatoes are tender; drain. In a big bowl, mix together the potatoes, sour cream, salt and pepper.

PLACE the potato mixture in a greased baking dish, layer the ham on top, the follow up with a layer of shredded cheese.  End with buttermilk, I just poured some over the top to make it a little creamier and not so dry.

BAKE 30 min. or until heated through.

1:48 PM Admin0
Scalloped Potatoes and Ham

Mmmmmm, comfort food.  If I could eat just comfort food, every single day, without ever putting on weight, I would do it.

Alas, I'm watching what I eat so I don't make these scalloped potatoes and ham very often, but last night, it just came together and at the request of my daughter, these were put in the oven.

I really have to control myself and not over do it, seriously, I could eat 2 or 3 helpings of these.  So good.

Scalloped Potatoes and Ham
Adapted from:  Kraft.com


7 medium potatoes, cut into 1/4-inch-thick slices
1 container (16 oz.) BREAKSTONE'S FREE or KNUDSEN Fat Free Sour Cream
Salt and pepper to taste
Chili flakes to taste
Shredded Mexican Blend cheese
1/2 lb. Black forest ham (I just tore it into small bite size pieces)
Buttermilk
 

HEAT oven to 350°F.

COOK potatoes in boiling water in large saucepan 10 to 12 min. or just until potatoes are tender; drain. In a big bowl, mix together the potatoes, sour cream, salt and pepper.

PLACE the potato mixture in a greased baking dish, layer the ham on top, the follow up with a layer of shredded cheese.  End with buttermilk, I just poured some over the top to make it a little creamier and not so dry.

BAKE 30 min. or until heated through.

Monday, July 14, 2014

Oooooohhhhh my word.  This cake is just beyond words.

If you're looking for simple cake to enjoy with a cup of hot coffee, then look no further, this is it.

I am not going to waste anymore time, but jump right into the recipe, because I know that is what you're waiting for.

Cinnamon Roll Cake
Cinnamon Roll Cake

Cake:
3 c. flour
1/4 tsp.salt
1 c. sugar
4 tsp. baking powder
1 1/2 c. milk
2 eggs
2 tsp. vanilla
1/2 c. butter, melted

Topping:
1 c. butter, softened
1 c. brown sugar
2 Tbsp. flour
1 Tbsp. cinnamon

Directions:
Mix everything together except for the butter. Slowly stir in the melted butter and pour into a greased 9×13 pan. For the topping, mix all the ingredients together until well combined. Drop evenly over the batter and swirl with a knife. Bake at 350 for 28-32 minutes.

Glaze:
2 c. powdered sugar
5 Tbsp. milk
1 tsp. vanilla

While warm drizzle the glaze over the cake.

5:15 PM Admin0
Oooooohhhhh my word.  This cake is just beyond words.

If you're looking for simple cake to enjoy with a cup of hot coffee, then look no further, this is it.

I am not going to waste anymore time, but jump right into the recipe, because I know that is what you're waiting for.

Cinnamon Roll Cake
Cinnamon Roll Cake

Cake:
3 c. flour
1/4 tsp.salt
1 c. sugar
4 tsp. baking powder
1 1/2 c. milk
2 eggs
2 tsp. vanilla
1/2 c. butter, melted

Topping:
1 c. butter, softened
1 c. brown sugar
2 Tbsp. flour
1 Tbsp. cinnamon

Directions:
Mix everything together except for the butter. Slowly stir in the melted butter and pour into a greased 9×13 pan. For the topping, mix all the ingredients together until well combined. Drop evenly over the batter and swirl with a knife. Bake at 350 for 28-32 minutes.

Glaze:
2 c. powdered sugar
5 Tbsp. milk
1 tsp. vanilla

While warm drizzle the glaze over the cake.

Thursday, July 10, 2014

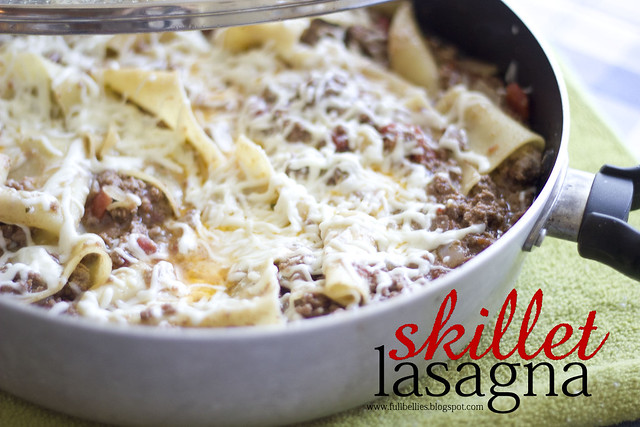
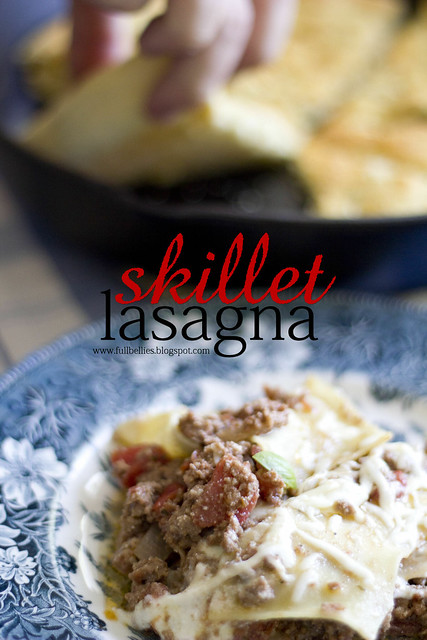
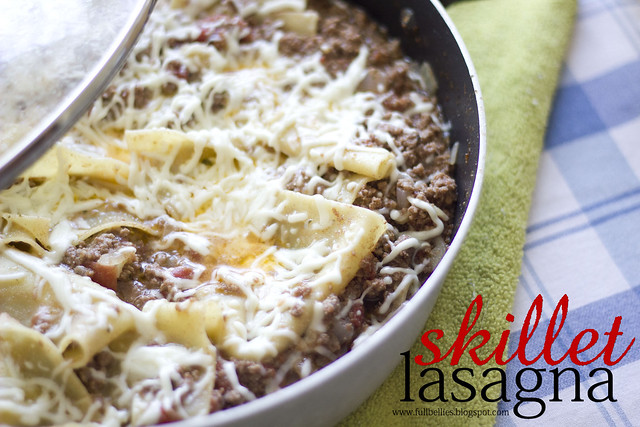
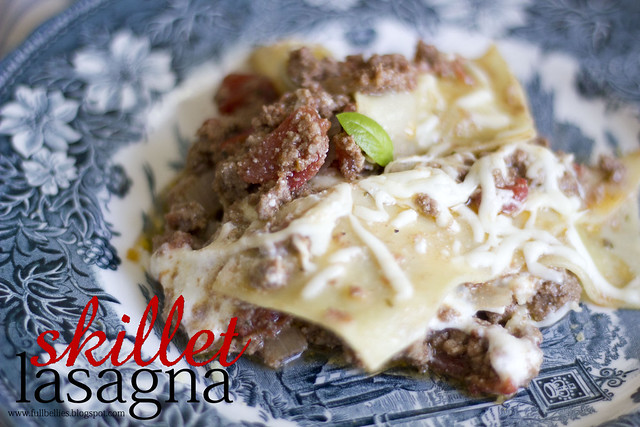
Skillet Lasagna

Lasagna!

If there is one thing we all enjoy, is a plate of gooey, cheesy, hot lasagna.  There is just something about it, it screams comfort food.

Usually it involves quite a long preparation process, and truth be told, it's always worth the time when you see it sitting there on your plate....stacked and those beautiful layers just waiting to be dug into.

Skillet Lasagna

But sometimes I want the taste of a good lasagna, only made in a fraction of the time, and if I can pile it all in one skillet, then even better.

This is a quick dish to make on a weekday, pair it with a slice of Foccacia, and your family will think you are superwoman.

Skillet Lasagna
Skillet Lasagna

Ingredients:

1 1/2 tablespoons extra virgin olive oil
1 large onion, chopped
1 cup mushrooms, chopped
2 garlic cloves, minced
2 (14.5 oz) cans Italian diced tomatoes, drained
1/4 cup tomato sauce
3 basil leaves, chopped
1/4 teaspoon black pepper
1 teaspoon sea salt
1/2 cup skim ricotta cheese
1/2 cup part skim mozzarella cheese
3 tablespoons Parmesan cheese
About 6 ounces lasagna noodles, broken into thirds & fully cooked
2 tablespoons parsley (dried or fresh)

Directions:

Heat oil in a large nonstick skillet over medium-high heat. Add onions and cook until softened, about 4 minutes. Add garlic and mushrooms and cook until garlic is fragrant, about one minute. Add in diced tomatoes, tomato sauce, basil, salt and pepper. Cook mixture until it thickens up a bit, around 5 minutes.
Add noodles to skillet and stir into the mixture well. Add scoops of ricotta cheese over the noodles; add in mozzarella and Parmesan. Stir in parsley. Cook about 2 more minutes, or until mixture is thick.
Serve immediately with additional basil or parsley.

7:19 PM Admin0
Skillet Lasagna

Lasagna!

If there is one thing we all enjoy, is a plate of gooey, cheesy, hot lasagna.  There is just something about it, it screams comfort food.

Usually it involves quite a long preparation process, and truth be told, it's always worth the time when you see it sitting there on your plate....stacked and those beautiful layers just waiting to be dug into.

Skillet Lasagna

But sometimes I want the taste of a good lasagna, only made in a fraction of the time, and if I can pile it all in one skillet, then even better.

This is a quick dish to make on a weekday, pair it with a slice of Foccacia, and your family will think you are superwoman.

Skillet Lasagna
Skillet Lasagna

Ingredients:

1 1/2 tablespoons extra virgin olive oil
1 large onion, chopped
1 cup mushrooms, chopped
2 garlic cloves, minced
2 (14.5 oz) cans Italian diced tomatoes, drained
1/4 cup tomato sauce
3 basil leaves, chopped
1/4 teaspoon black pepper
1 teaspoon sea salt
1/2 cup skim ricotta cheese
1/2 cup part skim mozzarella cheese
3 tablespoons Parmesan cheese
About 6 ounces lasagna noodles, broken into thirds & fully cooked
2 tablespoons parsley (dried or fresh)

Directions:

Heat oil in a large nonstick skillet over medium-high heat. Add onions and cook until softened, about 4 minutes. Add garlic and mushrooms and cook until garlic is fragrant, about one minute. Add in diced tomatoes, tomato sauce, basil, salt and pepper. Cook mixture until it thickens up a bit, around 5 minutes.
Add noodles to skillet and stir into the mixture well. Add scoops of ricotta cheese over the noodles; add in mozzarella and Parmesan. Stir in parsley. Cook about 2 more minutes, or until mixture is thick.
Serve immediately with additional basil or parsley.

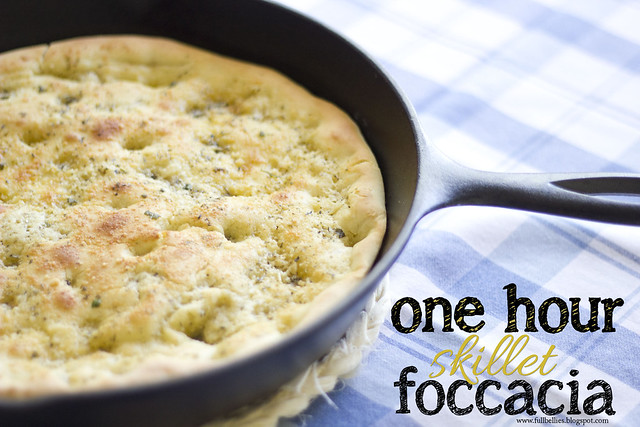
Who doesn't love a good foccacia???  I honestly hadn't had one in quite a long time, but I was recently gifted a beautiful cast iron skillet by my sweet friend Amy, and have since been trying my hand at yummy recipes.

This one was on my list to try and boy was it a huge hit for dinner tonight.

My husband and kids couldn't stop eating it and have requested it again.

Recipe comes from Crunchy, Creamy, Sweet.

One hour skillet foccacia
One Hour Skillet Foccacia


for the dough:
3/4 c warm water
1/2 tsp granulated sugar
1 1/2 tsp yeast (I used Red Star Active Dry Yeast
2 Tbsp olive or canola oil
2 c all-purpose flour ( divided )
1/2 tsp salt
for the parmesan butter brush:
3 Tbsp unsalted or salted butter, melted
1 Tbsp grated parmesan
1/2 tsp Italian seasoning


Place water and sugar in a large mixing bowl of a stand mixer. Stir until sugar dissolves.
Sprinkle yeast over the water and stir few times. Let sit until foamy ( about 5 minutes).
Turn the mixer on low speed and add 1 cup of flour and salt. Mix until combined.
Add oil and mix well.
Gradually add as much of the remaining cup of flour as you can ( it can be only 3/4 of it) and mix until the dough pulls away from the sides of the bowl.
In the meantime, preheat the oven to 220 degrees F and when it's ready turn it off. Keep the door closed.
Grease the skillet.
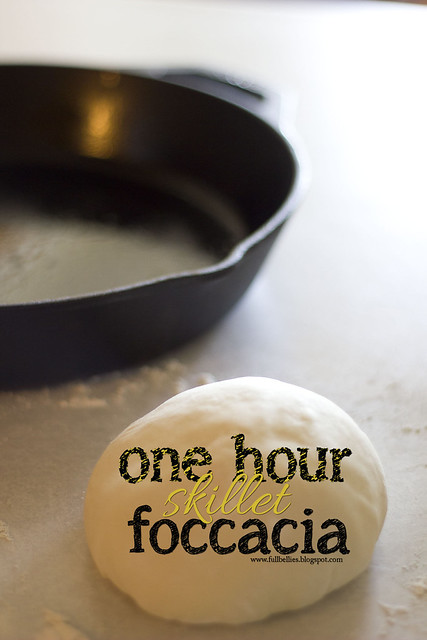
Place dough onto a floured surface (use the remaining flour from the second cup) and fold the dough few times until you feel it's smooth and not sticky anymore. Shape into a ball.

One hour skillet foccacia

Roll out the dough into a size of your skillet.
Place in skillet. Stretch up the sides. Cover with a kitchen towel and place in the oven for 20 minutes.
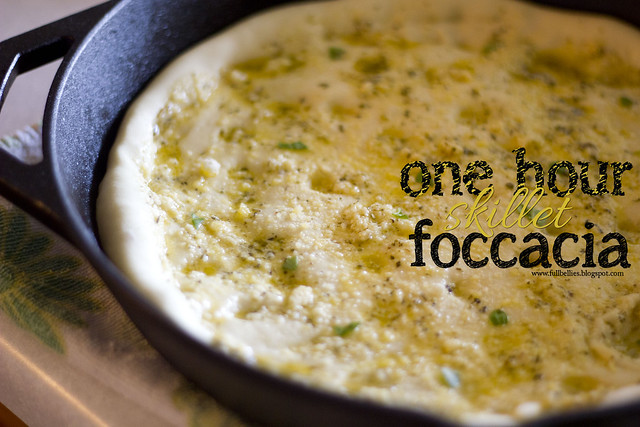
Take the skillet out of the oven and preheat the oven to 400 degrees F. Make indentations in the dough with your fingers.
Mix melted butter, parmesan and seasoning in a small bowl. Brush the dough with half the butter.

One hour skillet foccacia

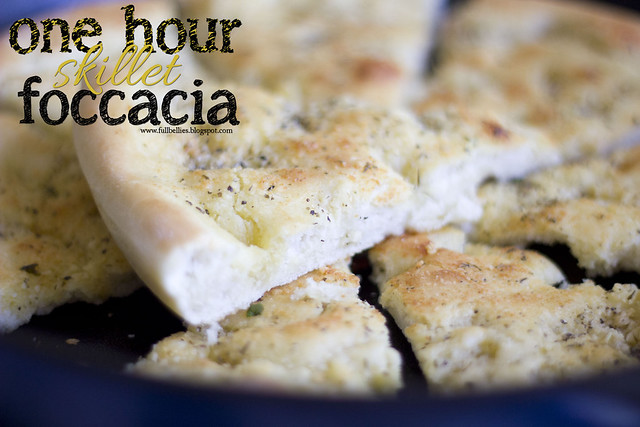
Place skillet with dough in the preheated oven and bake 20 minutes, or until golden brown. Brush with remaining butter. Let cool until safe to the touch and slice. Serve.

6:57 PM Admin0
Who doesn't love a good foccacia???  I honestly hadn't had one in quite a long time, but I was recently gifted a beautiful cast iron skillet by my sweet friend Amy, and have since been trying my hand at yummy recipes.

This one was on my list to try and boy was it a huge hit for dinner tonight.

My husband and kids couldn't stop eating it and have requested it again.

Recipe comes from Crunchy, Creamy, Sweet.

One hour skillet foccacia
One Hour Skillet Foccacia


for the dough:
3/4 c warm water
1/2 tsp granulated sugar
1 1/2 tsp yeast (I used Red Star Active Dry Yeast
2 Tbsp olive or canola oil
2 c all-purpose flour ( divided )
1/2 tsp salt
for the parmesan butter brush:
3 Tbsp unsalted or salted butter, melted
1 Tbsp grated parmesan
1/2 tsp Italian seasoning


Place water and sugar in a large mixing bowl of a stand mixer. Stir until sugar dissolves.
Sprinkle yeast over the water and stir few times. Let sit until foamy ( about 5 minutes).
Turn the mixer on low speed and add 1 cup of flour and salt. Mix until combined.
Add oil and mix well.
Gradually add as much of the remaining cup of flour as you can ( it can be only 3/4 of it) and mix until the dough pulls away from the sides of the bowl.
In the meantime, preheat the oven to 220 degrees F and when it's ready turn it off. Keep the door closed.
Grease the skillet.
Place dough onto a floured surface (use the remaining flour from the second cup) and fold the dough few times until you feel it's smooth and not sticky anymore. Shape into a ball.

One hour skillet foccacia

Roll out the dough into a size of your skillet.
Place in skillet. Stretch up the sides. Cover with a kitchen towel and place in the oven for 20 minutes.
Take the skillet out of the oven and preheat the oven to 400 degrees F. Make indentations in the dough with your fingers.
Mix melted butter, parmesan and seasoning in a small bowl. Brush the dough with half the butter.

One hour skillet foccacia

Place skillet with dough in the preheated oven and bake 20 minutes, or until golden brown. Brush with remaining butter. Let cool until safe to the touch and slice. Serve.

Ohhhh creamer, I love it so much.  I get so excited when Fall and Christmas roll around because I know that all the limited edition creamers will be hitting the shelves.

One thing I don't get excited about is the price.  These creamers can be quite pricey at times.

Of course you can forego the creamer in your coffee, but I'm a creamer kinda gal, I have to have a little splash of somethin' somethin' in there.  My favorite is plain old vanilla, but I also love caramel, cinnamon, girl scout cookies and hazelnut and creme brulee....see my problem???

If you only know just how easy it is to make these at home, you would never buy another at the store, and hey, if you keep a couple cans of sweetened condensed milk in the pantry, you will never run out.

So here you go, easy peasy creamer.

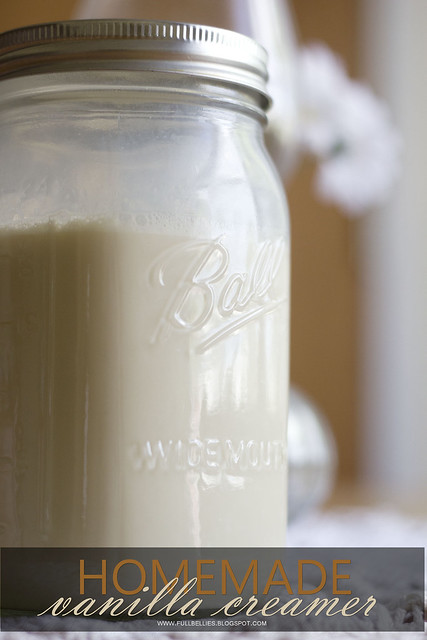
Homemade Vanilla Creamer

1 can (14 oz) sweetened condensed milk
1 and half cups of milk (can be skim, low fat, vitamin D, whatever)
Vanilla extract

Mix everything in a mason jar, shake it up well, and pop in the refrigerator.  It keeps for about 2 weeks.

Homemade Vanilla Creamer

How easy is that???

Kick it up, kick it down, change the flavoring, it's up to you.

Here are a few you can try:

Vanilla extract
Vanilla extract with a teaspoon of cinnamon
Almond extract
Cocoa
Coconut Extract
Pumpkin Pie Spice

source : http://fullbellies.blogspot.com/
4:26 PM Admin0
Ohhhh creamer, I love it so much.  I get so excited when Fall and Christmas roll around because I know that all the limited edition creamers will be hitting the shelves.

One thing I don't get excited about is the price.  These creamers can be quite pricey at times.

Of course you can forego the creamer in your coffee, but I'm a creamer kinda gal, I have to have a little splash of somethin' somethin' in there.  My favorite is plain old vanilla, but I also love caramel, cinnamon, girl scout cookies and hazelnut and creme brulee....see my problem???

If you only know just how easy it is to make these at home, you would never buy another at the store, and hey, if you keep a couple cans of sweetened condensed milk in the pantry, you will never run out.

So here you go, easy peasy creamer.

Homemade Vanilla Creamer

1 can (14 oz) sweetened condensed milk
1 and half cups of milk (can be skim, low fat, vitamin D, whatever)
Vanilla extract

Mix everything in a mason jar, shake it up well, and pop in the refrigerator.  It keeps for about 2 weeks.

Homemade Vanilla Creamer

How easy is that???

Kick it up, kick it down, change the flavoring, it's up to you.

Here are a few you can try:

Vanilla extract
Vanilla extract with a teaspoon of cinnamon
Almond extract
Cocoa
Coconut Extract
Pumpkin Pie Spice

source : http://fullbellies.blogspot.com/

Wednesday, July 9, 2014


I grew up in South Africa, as many of you know.  One of the things that I also grew up on, was the amazing taste of Nando's Chicken.  Oh my word, I can't begin to tell you how excited I would get when my parents would say that we were getting Nando's for dinner.

The minute you would walk into the Nando's Restaurant, you were hit with the delicious aroma of flame grilled chicken.  I remember we would get a whole chicken, plus fries and a salad and it was like the highlight of my week.  So good.

Since moving to the USA 16 years ago, I have not had any and I've missed it so very very much.  I do know that Nando's has a few restaurants here in the States but they are nowhere near where I live, unfortunately.

A few weeks ago I got an email asking me if I would be willing to try out some Nando's Sauces.  I swear, if you had to see my expression you would have thought someone just offered me a million dollars.  LOL

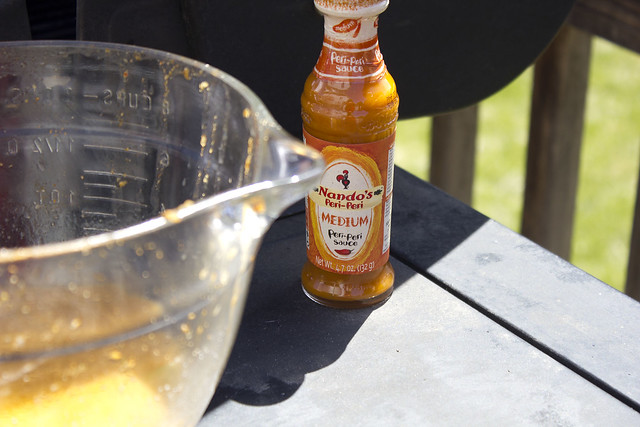
Nando's Peri Peri Chicken

I immediately said yes and waited *impatiently* for them to arrive, which didn't take very long.

The perfect time for me to try it the out, came when the World Cup game between Portugal and USA aired.  I invited my family over, because they too are huge Nando's fans, and we had a barbecue out back.

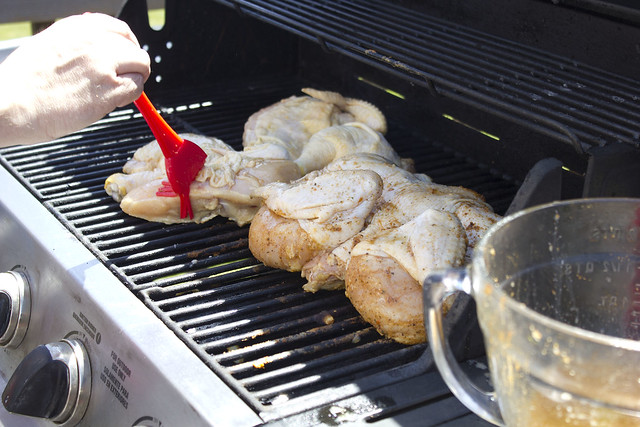
Nando's Peri Peri Chicken

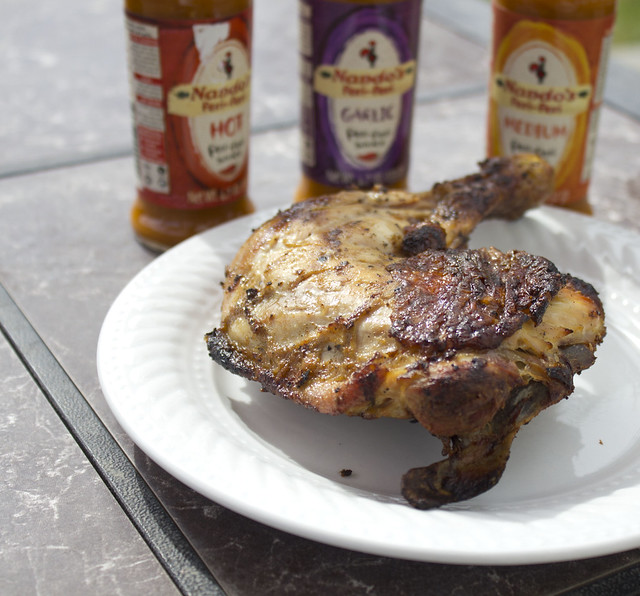
We used two chickens, and one with slathered on the Nando's Medium Sauce, the other we used the Garlic Sauce.

Nando's Peri Peri Chicken

My word, these were to die for.  We didn't even really eat anything else that was cooked that, we dug right into the chicken and devoured.  My husband and kids were in heaven, my brother and sister in law, niece and nephew and I were transported back to South Africa with just one bite, and everyone agreed that this was the best grilled chicken EVER.

Nando's Peri Peri Chicken

I don't really know what else to say about this other than TRY it.  Do yourself a favor and get some of the Nando's sauces, you will love them.

Best thing is that even though they are renowned for their amazing chicken, these sauces can also be used for seafood and meat.

_MG_4851

I had one jar left and decided to throw something together for dinner.  I didn't use a recipe, just marinated the beef in the sauce, then fried it on the skillet with some tomato sauce, onion and garlic.  Made a nice gravy with it and then added in some rice.

It was AMAZING, so delicious and had a nice kick to it.

All this to tell you that you have to buy Nando's sauces, and you have to cook with them, and if you can, you have to visit a local restaurant.  If you're in Washington D.C, Maryland and Virginia, be sure to check them out, for locations look here.

Thank you so much to Nando's for providing me with samples of their amazing sauce. 

source : http://fullbellies.blogspot.com/
4:02 PM Admin0


I grew up in South Africa, as many of you know.  One of the things that I also grew up on, was the amazing taste of Nando's Chicken.  Oh my word, I can't begin to tell you how excited I would get when my parents would say that we were getting Nando's for dinner.

The minute you would walk into the Nando's Restaurant, you were hit with the delicious aroma of flame grilled chicken.  I remember we would get a whole chicken, plus fries and a salad and it was like the highlight of my week.  So good.

Since moving to the USA 16 years ago, I have not had any and I've missed it so very very much.  I do know that Nando's has a few restaurants here in the States but they are nowhere near where I live, unfortunately.

A few weeks ago I got an email asking me if I would be willing to try out some Nando's Sauces.  I swear, if you had to see my expression you would have thought someone just offered me a million dollars.  LOL

Nando's Peri Peri Chicken

I immediately said yes and waited *impatiently* for them to arrive, which didn't take very long.

The perfect time for me to try it the out, came when the World Cup game between Portugal and USA aired.  I invited my family over, because they too are huge Nando's fans, and we had a barbecue out back.

Nando's Peri Peri Chicken

We used two chickens, and one with slathered on the Nando's Medium Sauce, the other we used the Garlic Sauce.

Nando's Peri Peri Chicken

My word, these were to die for.  We didn't even really eat anything else that was cooked that, we dug right into the chicken and devoured.  My husband and kids were in heaven, my brother and sister in law, niece and nephew and I were transported back to South Africa with just one bite, and everyone agreed that this was the best grilled chicken EVER.

Nando's Peri Peri Chicken

I don't really know what else to say about this other than TRY it.  Do yourself a favor and get some of the Nando's sauces, you will love them.

Best thing is that even though they are renowned for their amazing chicken, these sauces can also be used for seafood and meat.

_MG_4851

I had one jar left and decided to throw something together for dinner.  I didn't use a recipe, just marinated the beef in the sauce, then fried it on the skillet with some tomato sauce, onion and garlic.  Made a nice gravy with it and then added in some rice.

It was AMAZING, so delicious and had a nice kick to it.

All this to tell you that you have to buy Nando's sauces, and you have to cook with them, and if you can, you have to visit a local restaurant.  If you're in Washington D.C, Maryland and Virginia, be sure to check them out, for locations look here.

Thank you so much to Nando's for providing me with samples of their amazing sauce. 

source : http://fullbellies.blogspot.com/

Tuesday, July 8, 2014

This past week seems to have had a theme, Mexican.  I go through stages where I crave certain kinds of food, whether it be Mexican, Italian, Portuguese or Chinese.

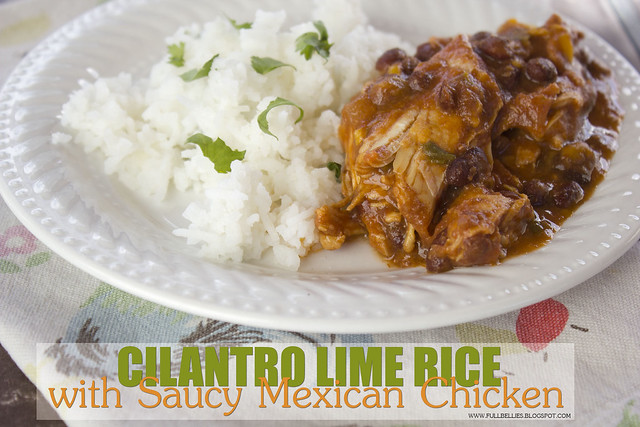
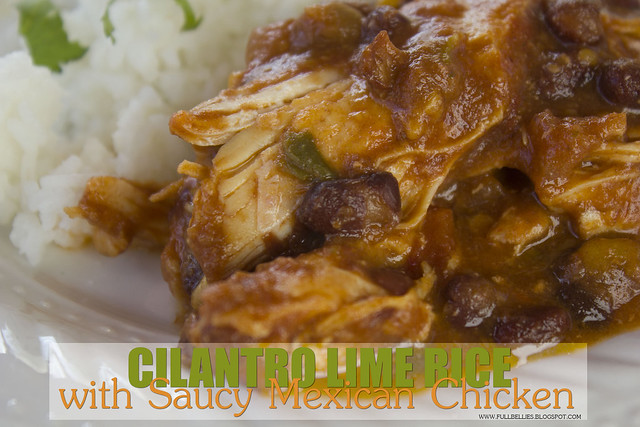
One of the meals I made this past week, was this easy and delicious Saucy Mexican Chicken, and guess what?  It's in the crockpot so even better.

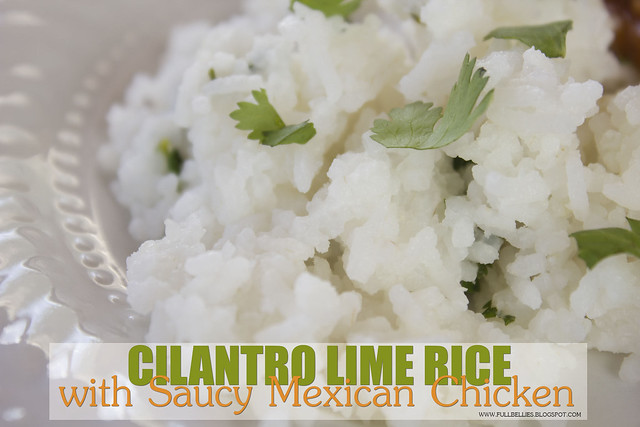
To go with it, some Cilantro Lime Rice which I love.

Cilantro Lime Rice with Saucy Mexican Chicken
Saucy Mexican Chicken
Source:  Kraft
4 servings - 320 calories

4 small boneless skinless chicken breasts (1 lb.)
1 cup TACO BELL® Thick & Chunky Salsa
1 can (15 oz.) black beans, undrained
1 cup KRAFT 2% Milk Shredded Cheddar Cheese


COOK chicken in nonstick skillet on medium-high heat 4 min. on each side or until browned on both sides.

ADD salsa and beans. Bring to boil; cover. Simmer on medium-low heat 5 min. or until chicken is done (165ºF).

TOP with cheese. Remove from heat. Let stand, covered, 5 min. or until cheese is melted.

Cilantro Lime Rice with Saucy Mexican Chicken


Now for the rice, I first tasted Cilantro Lime Rice at Chipotle and I immediately fell in love. Thankfully, one of my favorite healthy blogs out there, Skinny Taste, had just the right recipe for me and even my *plain rice* loving boys, love it.

Cilantro Lime Rice with Saucy Mexican Chicken
Cilantro Lime Rice
Source: Skinny Taste
Servings: 4 • Size: 3/4 cup • Old Points: 4 pts • Points+: 5 pts
Calories: 201.0 • Fat: 3.4 • Carbs: 37.4 • Fiber: 0 • Protein: 4.0 g


1 cup extra long grain rice or basmati rice
1/2 lime, juice of
2 cups water
1 tsp salt
3 tbsp fresh chopped cilantro
3 tsp vegetable oil


In a small heavy pot, add rice, water, 1 tsp oil and salt. Boil on high until most of the water evaporates. When the water just skims the top of the rice, reduce to low and cover about 15 minutes. Shut off flame and keep covered an additional 5 minute.

In a medium bowl, combine chopped cilantro, lime juice, rice and remaining oil and toss until completely mixed.

source : http://fullbellies.blogspot.com/
6:07 PM Admin0
This past week seems to have had a theme, Mexican.  I go through stages where I crave certain kinds of food, whether it be Mexican, Italian, Portuguese or Chinese.

One of the meals I made this past week, was this easy and delicious Saucy Mexican Chicken, and guess what?  It's in the crockpot so even better.

To go with it, some Cilantro Lime Rice which I love.

Cilantro Lime Rice with Saucy Mexican Chicken
Saucy Mexican Chicken
Source:  Kraft
4 servings - 320 calories

4 small boneless skinless chicken breasts (1 lb.)
1 cup TACO BELL® Thick & Chunky Salsa
1 can (15 oz.) black beans, undrained
1 cup KRAFT 2% Milk Shredded Cheddar Cheese


COOK chicken in nonstick skillet on medium-high heat 4 min. on each side or until browned on both sides.

ADD salsa and beans. Bring to boil; cover. Simmer on medium-low heat 5 min. or until chicken is done (165ºF).

TOP with cheese. Remove from heat. Let stand, covered, 5 min. or until cheese is melted.

Cilantro Lime Rice with Saucy Mexican Chicken


Now for the rice, I first tasted Cilantro Lime Rice at Chipotle and I immediately fell in love. Thankfully, one of my favorite healthy blogs out there, Skinny Taste, had just the right recipe for me and even my *plain rice* loving boys, love it.

Cilantro Lime Rice with Saucy Mexican Chicken
Cilantro Lime Rice
Source: Skinny Taste
Servings: 4 • Size: 3/4 cup • Old Points: 4 pts • Points+: 5 pts
Calories: 201.0 • Fat: 3.4 • Carbs: 37.4 • Fiber: 0 • Protein: 4.0 g


1 cup extra long grain rice or basmati rice
1/2 lime, juice of
2 cups water
1 tsp salt
3 tbsp fresh chopped cilantro
3 tsp vegetable oil


In a small heavy pot, add rice, water, 1 tsp oil and salt. Boil on high until most of the water evaporates. When the water just skims the top of the rice, reduce to low and cover about 15 minutes. Shut off flame and keep covered an additional 5 minute.

In a medium bowl, combine chopped cilantro, lime juice, rice and remaining oil and toss until completely mixed.

source : http://fullbellies.blogspot.com/
This is one of the easiest desserts to make, and you can keep it simple or jazz it up however you wish.  I don't make it often, matter of fact it came about as I tried to recreate something similar I had at a Mexican restaurant.

Cinnamon Sugar tortillas

Cinnamon Sugar Tortillas with Whipped Cream and Caramel


6 inch Flour tortillas, cut into wedges
cinnamon sugar
low fat whipped cream
caramel sauce

Cut the flour tortillas into wedge, I just cut each into fourths so we can have bigger wedges.  Lay them on a baking sheet and spray them with cooking spray.

Bake at 400 F oven for about 7 minutes or until crisp and brown.

Top with cinnamon sugar, a dollop of whipped cream and a drizzle of caramel sauce.  You can also omit the caramel sauce and just sprinkle the whipped cream with a little more cinnamon.

They are SO yummy!

5:54 PM Admin0
This is one of the easiest desserts to make, and you can keep it simple or jazz it up however you wish.  I don't make it often, matter of fact it came about as I tried to recreate something similar I had at a Mexican restaurant.

Cinnamon Sugar tortillas

Cinnamon Sugar Tortillas with Whipped Cream and Caramel


6 inch Flour tortillas, cut into wedges
cinnamon sugar
low fat whipped cream
caramel sauce

Cut the flour tortillas into wedge, I just cut each into fourths so we can have bigger wedges.  Lay them on a baking sheet and spray them with cooking spray.

Bake at 400 F oven for about 7 minutes or until crisp and brown.

Top with cinnamon sugar, a dollop of whipped cream and a drizzle of caramel sauce.  You can also omit the caramel sauce and just sprinkle the whipped cream with a little more cinnamon.

They are SO yummy!

I've started a Walk it Off in 30 Days Challenge, and with it a healthier menu.  I was never one to completely diet because I love food, so I have to find ways to make what I eat healthier with the addition of fruit and vegetables to my day.

When you menu plan, it makes it that much easier to include those healthy items.  I am basically still cooking all of our usual foods, just adding either salad or vegetables with each meal, and doing lots of fruit smoothies as breakfast and snacks.

The recipe I'm sharing today is a great one, it's low calorie and delicious, plus, you have Zucchini in there which is a good way to get the kids to eat their vegetables.

Turkey and vegetable tostadas
Turkey and Vegetable Tostadas
Source:  Kraft


6 flour tortillas (6 inch)
1 pkg. (1 oz.) TACO BELL® Taco Seasoning Mix, divided
1 lb. ground turkey breast
4 tomatoes, chopped, divided
1 cup chopped zucchini
1/2 cup water
1 cup KRAFT 2% Milk Shredded Colby & Monterey Jack Cheeses
1-1/2 cups shredded lettuce
3 Tbsp. chopped fresh cilantro


HEAT oven to 400°F.

PLACE tortillas in single layer on baking sheet; spray with cooking spray. Sprinkle with about 1 tsp. taco seasoning. Bake 6 min. or until crisp and lightly browned.

MEANWHILE, cook turkey in large skillet sprayed with cooking spray on medium-high heat 4 min. or until done, stirring frequently. Add 1 cup tomatoes, zucchini, water and remaining taco seasoning; simmer 5 min., stirring occasionally.

SPOON turkey mixture onto tortillas; top with cheese, lettuce, remaining tomatoes and cilantro.

source : http://fullbellies.blogspot.com/
5:49 PM Admin0
I've started a Walk it Off in 30 Days Challenge, and with it a healthier menu.  I was never one to completely diet because I love food, so I have to find ways to make what I eat healthier with the addition of fruit and vegetables to my day.

When you menu plan, it makes it that much easier to include those healthy items.  I am basically still cooking all of our usual foods, just adding either salad or vegetables with each meal, and doing lots of fruit smoothies as breakfast and snacks.

The recipe I'm sharing today is a great one, it's low calorie and delicious, plus, you have Zucchini in there which is a good way to get the kids to eat their vegetables.

Turkey and vegetable tostadas
Turkey and Vegetable Tostadas
Source:  Kraft


6 flour tortillas (6 inch)
1 pkg. (1 oz.) TACO BELL® Taco Seasoning Mix, divided
1 lb. ground turkey breast
4 tomatoes, chopped, divided
1 cup chopped zucchini
1/2 cup water
1 cup KRAFT 2% Milk Shredded Colby & Monterey Jack Cheeses
1-1/2 cups shredded lettuce
3 Tbsp. chopped fresh cilantro


HEAT oven to 400°F.

PLACE tortillas in single layer on baking sheet; spray with cooking spray. Sprinkle with about 1 tsp. taco seasoning. Bake 6 min. or until crisp and lightly browned.

MEANWHILE, cook turkey in large skillet sprayed with cooking spray on medium-high heat 4 min. or until done, stirring frequently. Add 1 cup tomatoes, zucchini, water and remaining taco seasoning; simmer 5 min., stirring occasionally.

SPOON turkey mixture onto tortillas; top with cheese, lettuce, remaining tomatoes and cilantro.

source : http://fullbellies.blogspot.com/

Saturday, July 5, 2014


It's that time of the year, barbecues, picnics, fun family get togethers and lazy days spent by the pool.

The only thing better than any of those, is knowing that with just a few ingredients and a few minutes, you can have amazing, delicious, eye catching desserts for your family and friends.

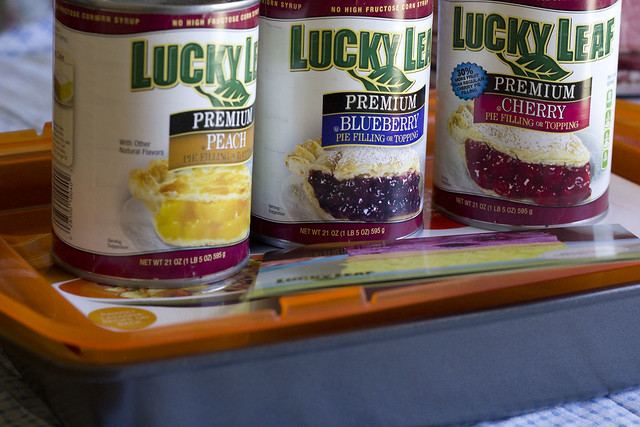
I've always counted on Lucky Leaf to provide me with just that, delicious pie fillings and a myriad of yummy recipes.

So, for this summer, I was sent some yummy pie fillings, some great recipes and a Rachael Ray baking pan with a lid. I had wanted one of those for a long time, so was super happy to get one.

_MG_5170

For the 4th of July we were having a barbecue with family and I figured that the desserts from the recipes sent, would be perfect for this family get together.

I asked the kids to pick which one they wanted, and my daughter suggested the White Chocolate Cherry Cream Pie, and my son opted for the Blueberry Orange Cake.

Both were really good, but the star of the day was the White Chocolate Cream Pie....OH MY WORD, that was divine.

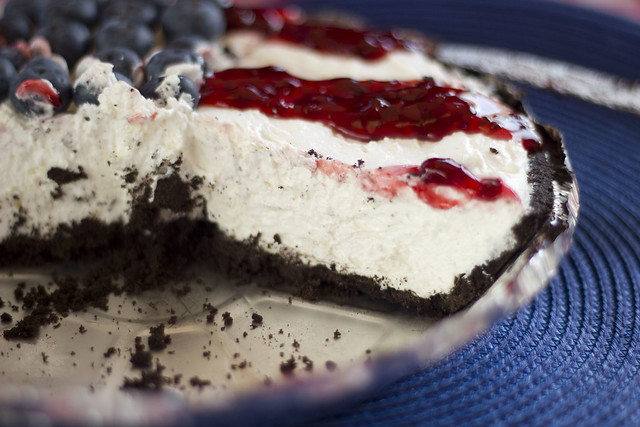
We adapted the decoration to use for the 4th of July, and my 15 year old daughter asked if she could be the one to decorate it, so she did and it turned out very cute. She used blueberries, and raspberry Lucky Leaf Pie Filling for the red stripes.

_MG_5268

White Chocolate Cherry Cream Pie

Serves: 8
Prep Time: 10 minutes
Chilling Time: 2 hours

Ingredients:

19-inch chocolate cookie crust
18-ounce package cream cheese, softened
½cup sugar
1teaspoon almond extract
½cup white chocolate chips
18-ounce package frozen whipped topping, thawed
121-ounce can LUCKY LEAF® Regular or Premium Cherry Pie Filling

Directions:

Beat cream cheese, sugar and almond extract until smooth in a large bowl.
Melt white chocolate in microwave according to package directions. When melted, pour into cream cheese mixture.
Beat with electric mixer until smooth.
Fold whipped topping into mixture. Pour evenly into crust.
Cover and chill for at least 2 hours, or until ready to serve.
Spoon Lucky Leaf Cherry Pie Filling on top just before serving. Garnish with white chocolate chips if desired.

_MG_5269

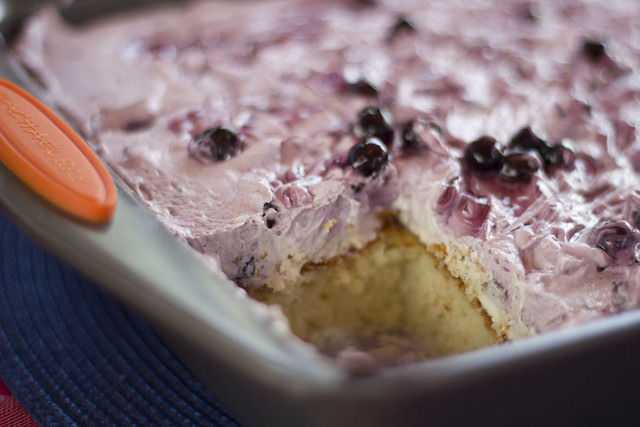
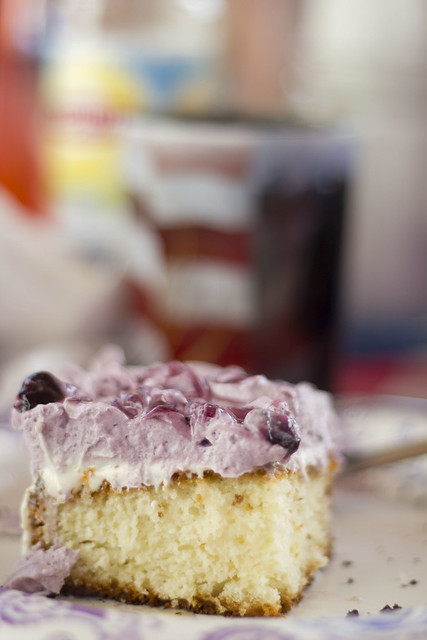
Now for the Blueberry Orange Cake. I could not find the orangesicle flavored frosting, and I thought about using lemon but couldn't find it at the store I was at either, so I opted for plain vanilla to which I added orange juice for flavoring. It worked fine.

_MG_5271

Blueberry Orange Cake

Ingredients
1 white cake mix (15.25 oz.)
1 can sweetened condensed milk (14 oz.)
1 can ready made Orangesicle Frosting (16 oz.)
1 can Blueberry Pie filling (Lucky Leaf 21 oz.)
1 container Cool Whip (8 oz.)

Instructions

Bake the cake using the package directions for a 9x13 cake. Let the cake cool 5 minutes, then use a fork or end of a wooden spoon to poke holes all over the top of the cake. Drizzle the can of sweetened condensed milk over the top slowly. Let the cake cool on the counter completely. Then refrigerate to chill.
Remove the foil lid on the frosting. Heat in the microwave for 20 seconds. Stir and then spread over the top of the chilled cake.
Set aside 2 Tablespoons of pie filling. Stir together the Cool Whip and remaining pie filling. Spread over the frosting layer. Spoon tiny dots of the reserved pie filling over the top. Swirl gently with a knife. Refrigerate until time to serve. Cut into 24 pieces. Store the remaining cake in a sealed container in the refrigerator.

_MG_5273

These turned out to be one of the best parts of the meal, loved by both young and old and I think they will go right into my file of favorites.

To celebrate summer, Lucky Leaf has graciously offered one of my readers their very own lucky leaf pie filling and recipe cards.

Just leave a comment below and let me know from these two recipes I shared, which one you would want to try first.

You can purchase your very own Lucky Leaf Pie Fillings here.

Also be sure to check out Lucky Leaf on Facebook and Twitter.

Contest open to US residents.  Good Luck!

source : http://fullbellies.blogspot.com/
12:49 PM Admin0

It's that time of the year, barbecues, picnics, fun family get togethers and lazy days spent by the pool.

The only thing better than any of those, is knowing that with just a few ingredients and a few minutes, you can have amazing, delicious, eye catching desserts for your family and friends.

I've always counted on Lucky Leaf to provide me with just that, delicious pie fillings and a myriad of yummy recipes.

So, for this summer, I was sent some yummy pie fillings, some great recipes and a Rachael Ray baking pan with a lid. I had wanted one of those for a long time, so was super happy to get one.

_MG_5170

For the 4th of July we were having a barbecue with family and I figured that the desserts from the recipes sent, would be perfect for this family get together.

I asked the kids to pick which one they wanted, and my daughter suggested the White Chocolate Cherry Cream Pie, and my son opted for the Blueberry Orange Cake.

Both were really good, but the star of the day was the White Chocolate Cream Pie....OH MY WORD, that was divine.

We adapted the decoration to use for the 4th of July, and my 15 year old daughter asked if she could be the one to decorate it, so she did and it turned out very cute. She used blueberries, and raspberry Lucky Leaf Pie Filling for the red stripes.

_MG_5268

White Chocolate Cherry Cream Pie

Serves: 8
Prep Time: 10 minutes
Chilling Time: 2 hours

Ingredients:

19-inch chocolate cookie crust
18-ounce package cream cheese, softened
½cup sugar
1teaspoon almond extract
½cup white chocolate chips
18-ounce package frozen whipped topping, thawed
121-ounce can LUCKY LEAF® Regular or Premium Cherry Pie Filling

Directions:

Beat cream cheese, sugar and almond extract until smooth in a large bowl.
Melt white chocolate in microwave according to package directions. When melted, pour into cream cheese mixture.
Beat with electric mixer until smooth.
Fold whipped topping into mixture. Pour evenly into crust.
Cover and chill for at least 2 hours, or until ready to serve.
Spoon Lucky Leaf Cherry Pie Filling on top just before serving. Garnish with white chocolate chips if desired.

_MG_5269

Now for the Blueberry Orange Cake. I could not find the orangesicle flavored frosting, and I thought about using lemon but couldn't find it at the store I was at either, so I opted for plain vanilla to which I added orange juice for flavoring. It worked fine.

_MG_5271

Blueberry Orange Cake

Ingredients
1 white cake mix (15.25 oz.)
1 can sweetened condensed milk (14 oz.)
1 can ready made Orangesicle Frosting (16 oz.)
1 can Blueberry Pie filling (Lucky Leaf 21 oz.)
1 container Cool Whip (8 oz.)

Instructions

Bake the cake using the package directions for a 9x13 cake. Let the cake cool 5 minutes, then use a fork or end of a wooden spoon to poke holes all over the top of the cake. Drizzle the can of sweetened condensed milk over the top slowly. Let the cake cool on the counter completely. Then refrigerate to chill.
Remove the foil lid on the frosting. Heat in the microwave for 20 seconds. Stir and then spread over the top of the chilled cake.
Set aside 2 Tablespoons of pie filling. Stir together the Cool Whip and remaining pie filling. Spread over the frosting layer. Spoon tiny dots of the reserved pie filling over the top. Swirl gently with a knife. Refrigerate until time to serve. Cut into 24 pieces. Store the remaining cake in a sealed container in the refrigerator.

_MG_5273

These turned out to be one of the best parts of the meal, loved by both young and old and I think they will go right into my file of favorites.

To celebrate summer, Lucky Leaf has graciously offered one of my readers their very own lucky leaf pie filling and recipe cards.

Just leave a comment below and let me know from these two recipes I shared, which one you would want to try first.

You can purchase your very own Lucky Leaf Pie Fillings here.

Also be sure to check out Lucky Leaf on Facebook and Twitter.

Contest open to US residents.  Good Luck!

source : http://fullbellies.blogspot.com/

Wednesday, July 2, 2014

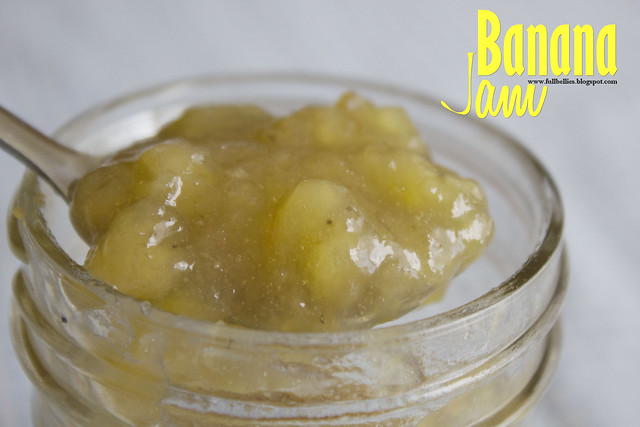
Banana Jam

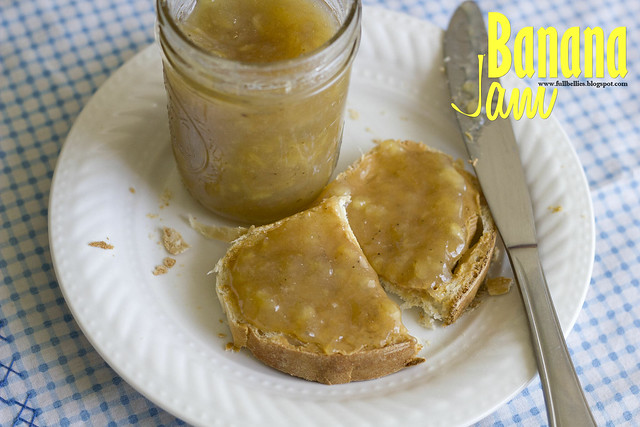
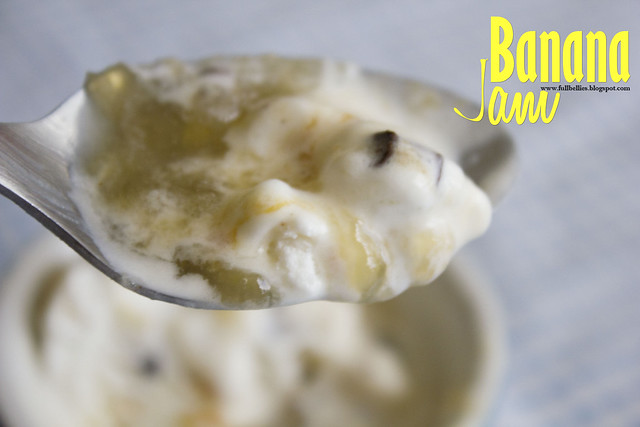
Hello friends, I am coming by today to bring you the recipe for what will become one of your favorite things on earth.  I'm not even kidding, you will be addicted and will find yourself dripping this delicious velvety goodness all over everything.....toast....peanut butter sandwiches....pancakes.....waffles....and ice cream.  ICE.CREAM drizzled with this amazing banana jam.

Banana Jam

I'm just going to stop talking now and tell you that this jam will change your life.  Seriously!!!

I know Banana Jam is not something you often hear about, to be quite honest, I has never heard of it until about a year ago and then I knew I had to try it since I love bananas and banana flavored anything.

Give a try, really, just do it, you'll be so happy you did.

Banana Jam
Banana Jam
Makes 6 Half Pint Jars

4 cups mashed bananas
4 cups sugar
1 teaspoon vanilla essence
Freshly squeezed lemon juice (I used about 1 tablespoon and a half)

Sterilize your jars and lids as recommended.  I just boil them in a big pot of water for about 10 minutes, turn off the heat and let them hang out in there until ready to fill with the jam.  When ready, I remove them carefully, pour out the water and let them sit on a kitchen towel right side up for about a minute.

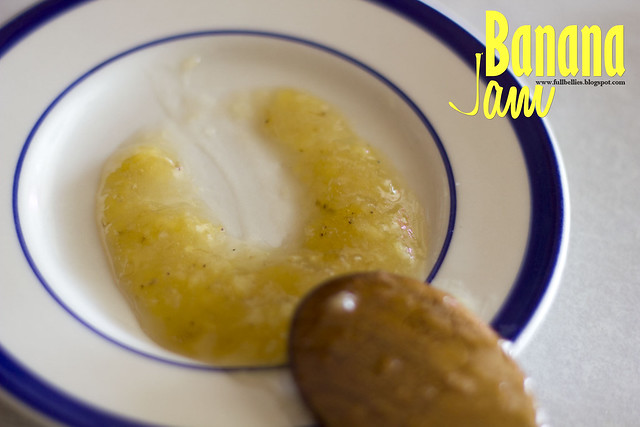
Now, for the jam, combine the bananas, sugar, vanilla and lemon juice in a big pot.  Bring to a boil and turn the heat to medium, stir occasionally until nice and thick.  The way to know when the jam is done, is to take a teaspoon and put on a small saucer, run the spoon through the jam, it will separate and not run back together.

Banana Jam

Pour into the jars, and then process in boiling water for 10 minutes.  Make sure the jars are covered with water an inch to 2 inches above the lid.

Remove with the jar lifter and carefully set on a kitchen towel.  Let cool completely and listen for the beautiful pop, pop, pop as the lids seal.

Enjoy!

Once opened, refrigerate.  It will keep for about 2 weeks in the refrigerator, or keep in the pantry for up to a year.

source : http://fullbellies.blogspot.com/
3:26 PM Admin0
Banana Jam

Hello friends, I am coming by today to bring you the recipe for what will become one of your favorite things on earth.  I'm not even kidding, you will be addicted and will find yourself dripping this delicious velvety goodness all over everything.....toast....peanut butter sandwiches....pancakes.....waffles....and ice cream.  ICE.CREAM drizzled with this amazing banana jam.

Banana Jam

I'm just going to stop talking now and tell you that this jam will change your life.  Seriously!!!

I know Banana Jam is not something you often hear about, to be quite honest, I has never heard of it until about a year ago and then I knew I had to try it since I love bananas and banana flavored anything.

Give a try, really, just do it, you'll be so happy you did.

Banana Jam
Banana Jam
Makes 6 Half Pint Jars

4 cups mashed bananas
4 cups sugar
1 teaspoon vanilla essence
Freshly squeezed lemon juice (I used about 1 tablespoon and a half)

Sterilize your jars and lids as recommended.  I just boil them in a big pot of water for about 10 minutes, turn off the heat and let them hang out in there until ready to fill with the jam.  When ready, I remove them carefully, pour out the water and let them sit on a kitchen towel right side up for about a minute.

Now, for the jam, combine the bananas, sugar, vanilla and lemon juice in a big pot.  Bring to a boil and turn the heat to medium, stir occasionally until nice and thick.  The way to know when the jam is done, is to take a teaspoon and put on a small saucer, run the spoon through the jam, it will separate and not run back together.

Banana Jam

Pour into the jars, and then process in boiling water for 10 minutes.  Make sure the jars are covered with water an inch to 2 inches above the lid.

Remove with the jar lifter and carefully set on a kitchen towel.  Let cool completely and listen for the beautiful pop, pop, pop as the lids seal.

Enjoy!

Once opened, refrigerate.  It will keep for about 2 weeks in the refrigerator, or keep in the pantry for up to a year.

source : http://fullbellies.blogspot.com/